Virtual Home Administrator Guide
- What is this tool?
- Logging into the admin portal
- How do I create groups?
- How do I create user accounts?
- How do I add administrators?
- How do I customise the invitation/welcome email for users?
- How do I deal with a user who has been locked out?
- Other administrative tasks
- Where can I find more help?
Download a PDF version of this guide.
What is this tool?
The Virtual Home (VH) enables small organisations, including collaborative research facilities, to manage user identities for international, government, and industry based researchers. The VH replaces older software (the VHO) and has been developed by the Australian Access Federation. The VH uses new technology, and is based on real requirements and use cases.
As an administrator, you may need to log into the VH to grant users access or manage existing users. You can log into the VH using your Institution credentials or your VH credentials.
Logging into the admin portal
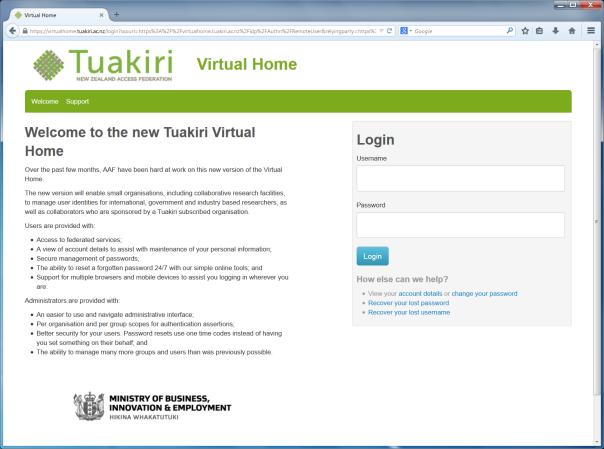
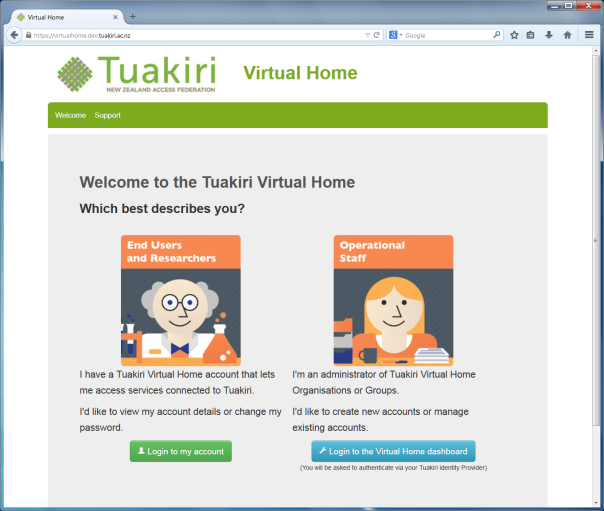
To access the administrator portal, visit https://virtualhome.tuakiri.ac.nz and click ‘Login to the Tuakiri Virtual Home dashboard’ (the blue button).
Usually you’d log in using your Institution credentials. If these don’t grant you administrator privileges, try your VH credentials if you have them. Otherwise, please get in touch with support@tuakiri.ac.nz.
How do I create groups?
As an Organisation Administrator, you have the ability to manage groups and user accounts. As a Group Administrator, you can only manage user accounts. This guide uses the ‘Example Organisation’ organisation and the ‘Default Group’ group.
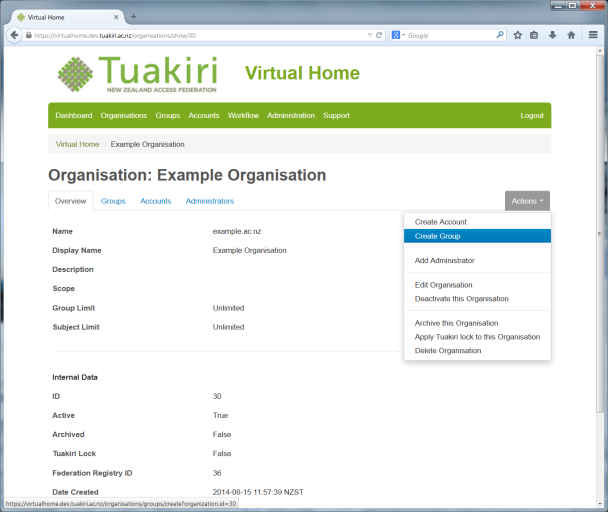
Select your organisation from the Dashboard (the main page) and find the Actions menu. The Actions menu items are consistent no matter which of the four tabs you are viewing. To create a Group, click the Create Group option to walk you through the process.
How do I create user accounts?
As an Organisation Administrator, you have the ability to manage groups and user accounts. As a Group Administrator, you can only manage user accounts. This guide uses the ‘Example Organisation’ organisation and the ‘Default Group’ group.
Select your organisation from the Dashboard (the main page) and find the Actions menu. The Actions menu items are consistent no matter which of the four tabs (Overview, Groups, Accounts, or Administrators) you are viewing.
To create an account, click the Create Account option to walk you through the process. The user will then receive a ‘welcome email’ inviting them to create a username and set a password. 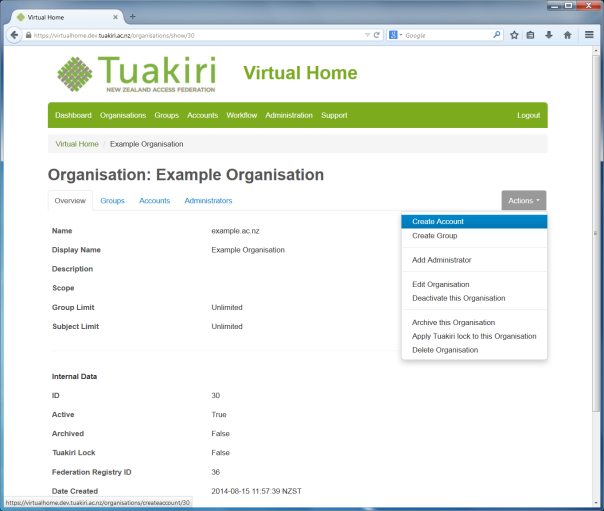
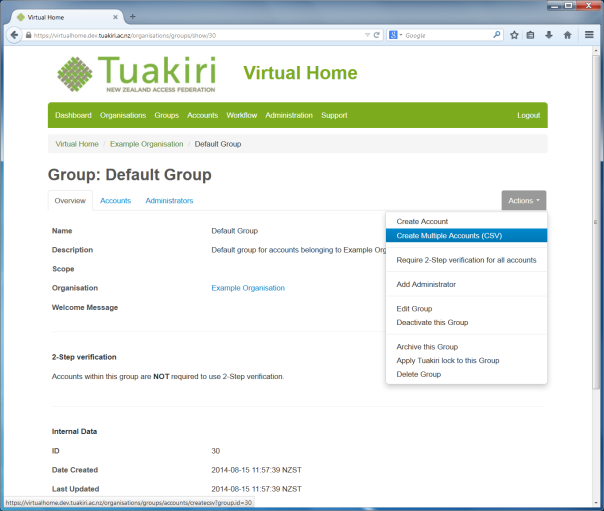
You can also create accounts quicker (or in bulk) by viewing the Group first, and then clicking on the Actions menu. The Create Account option still exists, but you are also given the option to Create Multiple Accounts via CSV file upload. You will see instructions on how to create the CSV file.
How do I add administrators?
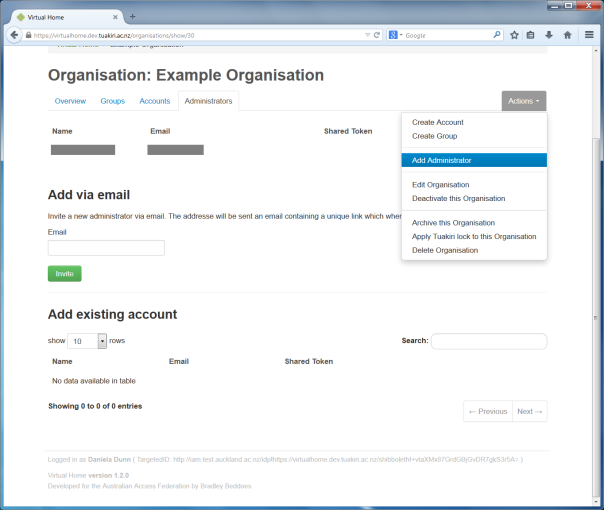
Use the Actions menu to click the Add Administrator button.
You can either search for the user using the search tool and click the green Add button next to their name (N.B. the user must have previously logged into the VH for them to appear), or alternatively use the ‘Invite’ button to automatically invite and grant the administrator privileges to this user.
How do I customise the invitation/welcome email for users?
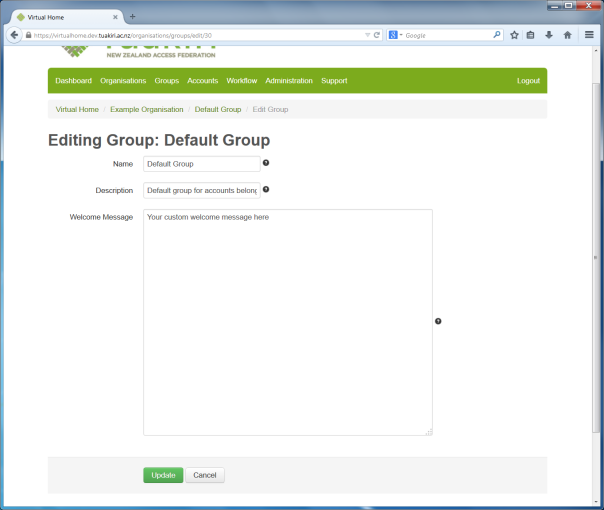
Administrators can add a custom message to the invitation email that is sent to new users. Navigate to the Group (where you intend to add users), click the Actions menu, and then Edit Group.
This will present a screen where you can edit the name of the Group, but more importantly, add a custom message that is added to the user’s invitation email. Once this is saved, your message will appear in the invitation email for new accounts as a paragraph above the heading “Your action is required”.
Note: Each Group can have a unique message if you desire. All users invited to this Group will see the same invitation email message.
How do I deal with a user who has been locked out?
Users are locked out of their account when they fail to login five or more times. After three failed logins, the user will also be presented with a CAPTCHA on the login screen. After five failed logins, the user’s account is locked out, they will no longer be able to login, they will receive an email telling them their account has been locked out, and they must contact an administrator to have their account unlocked.
The account can be re-activated by navigating to the account, clicking the Actions menu, and selecting “Activate this Account”.

Other administrative tasks
As an administrator, there are many other things you can do:
- Lock an account out (and activate it, if it has been locked out previously)
- Generate a password reset code, which may be sent via email or via SMS
- Require an individual account or an entire group to use 2-step verification (using an authentication app on the user’s mobile device)
- Reset the 2-step verification secret for an account
- Resend the invitation/welcome email
- View the account finalisation URL (and send it to the user, if they are unable to finalise their account using the invitation/welcome email)
Where can I find more help?
Contact Tuakiri support on support@tuakiri.ac.nz.